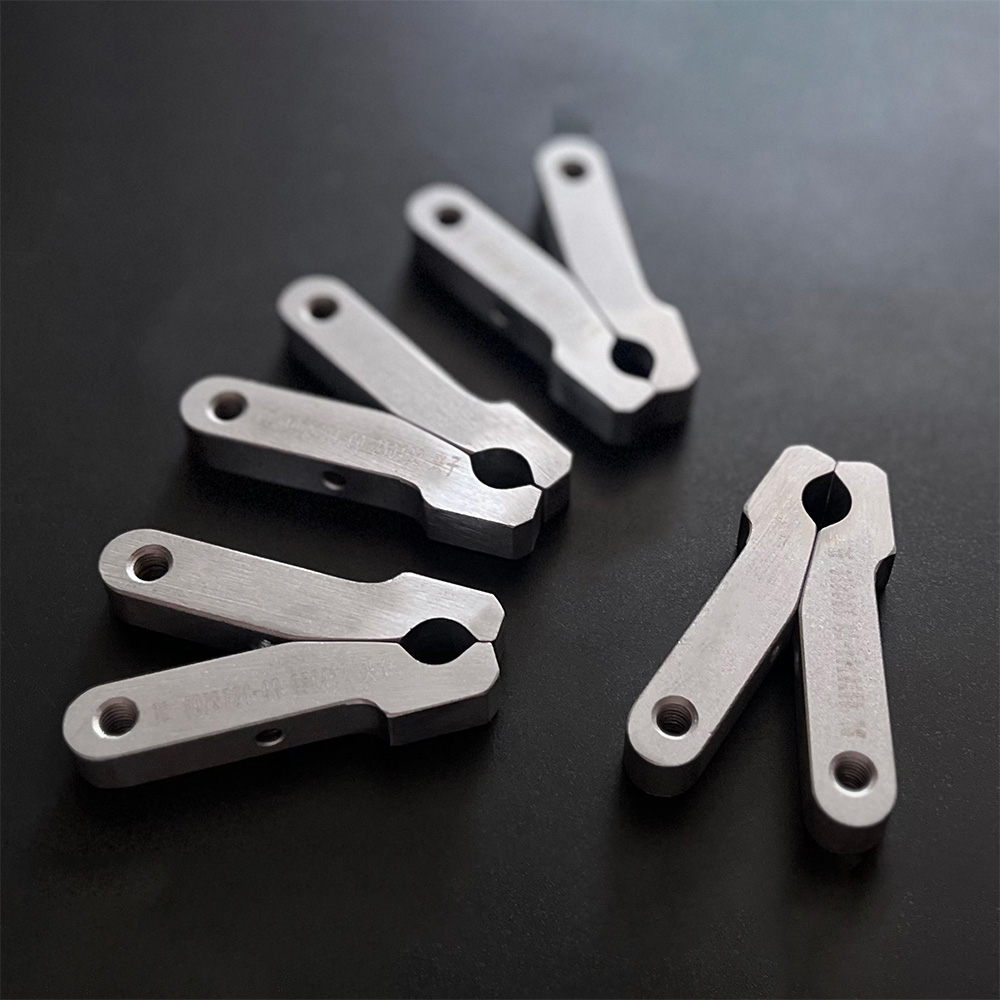
Comprehensive Guide to Transfer Finger Technology
What is Transfer Finger?
Transfer Finger refers to a specialized component in industrial automation systems designed for precise material handling and transfer operations. These electromechanical devices typically feature a positioning accuracy of ±0.01mm and can operate at speeds up to 2.5 m/s with repeatability of ±5μm. Modern transfer fingers incorporate advanced sensors providing 16-bit resolution feedback at sampling rates exceeding 1kHz, enabling real-time adaptive control. The typical load capacity ranges from 0.5kg to 15kg depending on the model, with high-end versions capable of 50,000+ cycles per hour in continuous operation.
Key characteristics include multi-axis articulation (typically 3-6 degrees of freedom), integrated force sensing (0.1N resolution), and compatibility with industrial communication protocols like EtherCAT or PROFINET. The operational temperature range spans -10°C to 60°C with specialized versions available for extreme environments.

Technical Specifications and Performance Data
Precision Mechanics
The mechanical structure utilizes aerospace-grade aluminum alloys (typically 6082-T6) with hardness ratings of 95 HRB and surface roughness below Ra 0.8μm. Linear guides achieve C3-grade precision with preload adjustments of 0.01-0.03mm. Bearing systems are rated for L10 life exceeding 20,000 hours under nominal loads.
Drive Systems
Servo motors deliver continuous torque from 0.5Nm to 15Nm with peak torque up to 300% of rated value. The drive systems feature 24-bit absolute encoders and achieve velocity ripple below 0.05%. Power requirements range from 48VDC to 400VAC depending on the application scale.
Control Systems
Embedded controllers process motion commands with 1μs cycle times and support advanced trajectory planning algorithms. The control bandwidth typically exceeds 500Hz for position loops and 1kHz for current control. Safety systems include SIL2/PLe rated components with reaction times under 10ms.
Application Scenarios
Electronics Manufacturing: Precision placement of SMD components with 0201 package handling (0.6mm × 0.3mm) at rates of 30,000 CPH. The anti-static ceramic grippers prevent component damage during transfer.
Pharmaceutical Packaging: Aseptic handling of blister packs with ISO Class 5 cleanliness compliance. Specialized versions maintain <0.1μg/m³ particulate emission during operation.
Automotive Assembly: Heavy-duty variants handle engine components up to 15kg with ±0.05mm positioning accuracy. The IP67-rated models withstand washdown environments.
Food Processing: Hygienic designs with FDA-compliant materials achieve <1 CFU/cm² microbial levels after cleaning. Special grippers handle delicate products without deformation (<3% compression).
Semiconductor Handling: Ultra-clean versions for wafer transfer feature class 1 cleanroom compatibility with <0.1nm/min particle generation rates. The non-magnetic designs prevent interference with sensitive processes.
Maintenance Procedures
Daily Maintenance
Perform visual inspections for mechanical wear, checking guide rails for scoring exceeding 0.05mm depth. Verify lubrication levels in recirculating ball screws (grease quantity 15-20% of free volume). Monitor servo motor temperatures (<75°C under load) and check for abnormal vibrations (<2.5mm/s RMS velocity).
Weekly Procedures
Clean optical sensors with IPA-wiped lint-free swabs. Check belt tensions (40-60N for GT3 belts) using frequency measurement tools. Verify encoder alignment within ±0.1° using oscilloscope patterns. Test emergency stop response times (<15ms from trigger to full stop).
Monthly Maintenance
Replace wear components per manufacturer's MTBF schedules (typically 5,000 hours for bearings, 10,000 hours for belts). Recalibrate force sensors using traceable weights (Class F1 or better). Perform backlash measurements (<0.005mm acceptable) using dial indicators. Update firmware to latest stable version.
Annual Overhaul
Complete disassembly for deep cleaning using ultrasonic baths (40kHz, 30°C maximum). Replace all seals and gaskets. Measure geometric accuracy using laser interferometers (<±2μm> straightness deviation). Perform dynamic stiffness tests with 500N impulse loads checking for <5μm displacement.
Special Considerations: In cleanroom environments, use only low-outgassing lubricants (total mass loss <1.0%). For food applications, verify material certificates (EU 10/2011 compliance). In explosive atmospheres, inspect ATEX-rated components for integrity.


